Windows Inventory Collection Script
Many customers have requested the ability to report on things that are either not collected or not accurately collected by Intune. In an effort to fill these gaps in we have implemented a custom solution to collect some of the most commonly requested items. Currently this list includes:
- Software installed on Windows 10 devices.
- Software installation date.
- Monitors (LCD's) connected to Windows 10 devices.
- Disk health.
- Last Reboot time.
- Additional CPU details.
- OS Install date.
- Additional RAM details.
- Battery health.
- Friendly model names for Lenovo computers.
- Warranty information for Dell, Lenovo, HP, and Getac computers.
- M365 update installation and compliance details.
- Windows driver inventory.
This data is collected via PowerShell, sent to a Log Analytics workspace, and then pulled into Power BI. Most customers leverage a Proactive Remediation detection to run the PowerShell script on a defined schedule. In this document we describe how to configure the script and deploy it using a Proactive Remediation however there are many ways that you might run a script on a schedule.
Prerequisites:
- Appropriate licenses to use remediation scripts in Intune.
- Dell requires an API token, which you can request by applying at https://techdirect.dell.com/Portal/APIs.aspx.
- Lenovo requires a client token. Unlike Dell, this process is less straightforward—you’ll need to contact your Lenovo account representative to request the token on your behalf.
- HP requires both an API key and a secret. Note that the secret expires frequently. During our testing, the HP API was often unreliable; however, their support team was responsive, and it’s encouraging to see HP making the API available to customers again. You can initiate access by contacting your HP representative or by signing up at https://developers.hp.com/.
You can copy the PowerShell script from our GitHub repository.

Step 1: Configure the script for Log Ingestion API
- Paste the PowerShell code into your favorite script editor.
- Locate the line starting with $LogAPIMode and ensure it is set to "LogIngestionAPI".
- Enter the following values from the Create Inventory App Registration and Deploy Custom Inventory Resources guides:
- $TenantId — Directory (Tenant) ID from Create Inventory App Registration
- $ClientId — Application (Client) ID from Create Inventory App Registration
- $ClientSecret — Client Secret Value from Create Inventory App Registration
- $DceURI — Data Collection Endpoint URI from Deploy Custom Inventory Resources Step 2
- $DcrImmutableId — DCR Immutable ID from Deploy Custom Inventory Resources Step 2
- Save the script as a .ps1 file. For example CollectInventory.ps1.
Step 2: Enable warranty data collection
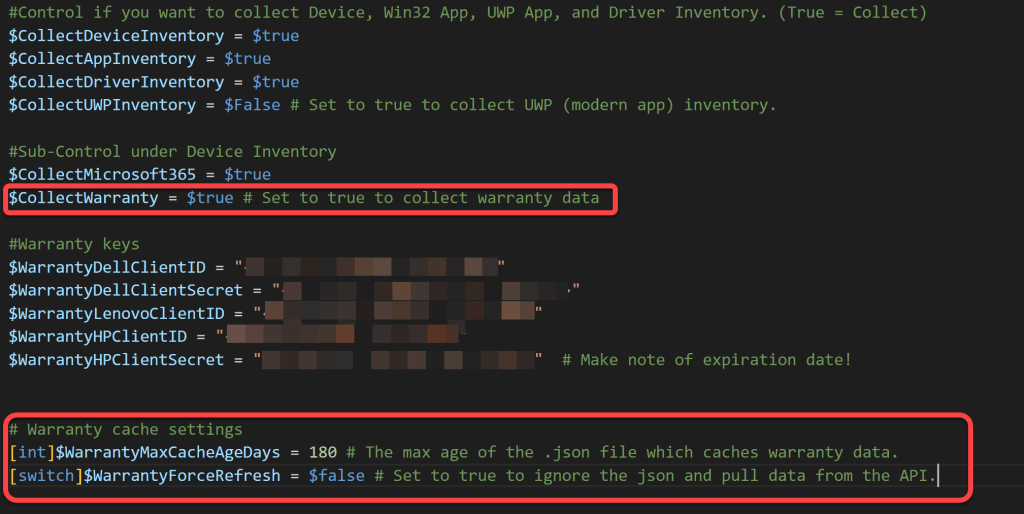
- If you plan to collect warranty data set $CollectWarranty = $true.
- Warranty data is cached locally on each device so that we do not make a call to the manufacturer API for each device each day. The cache is refreshed every 180 days by default. This is configurable using $WarrantyMaxCacheAgeDays. The cache can be force refreshed using $WarrantyForceRefresh.
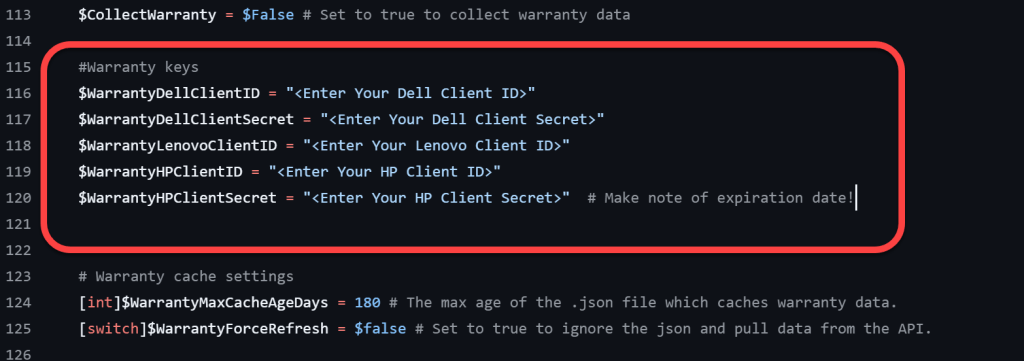
Step 3: Enter manufacturer API credentials
- If applicable enter the Dell Client ID and Client Secret values. When you retrieve this info from TechDirect it will be in a format similar to xxxxxxxxxx (yyyyyyyyy). The part before the opening parenthesis is the Client ID, the part inside the parenthesis is the Client Secret. (Note: Do not enter the parenthesis themselves in the script)
- If applicable enter the Lenovo Client ID provided to you by your Lenovo account rep.
- If applicable enter the HP Client ID and Client Secret provided to you by your HP account rep. (Note: HP expires their secrets very frequently so you will have to update these regularly.)
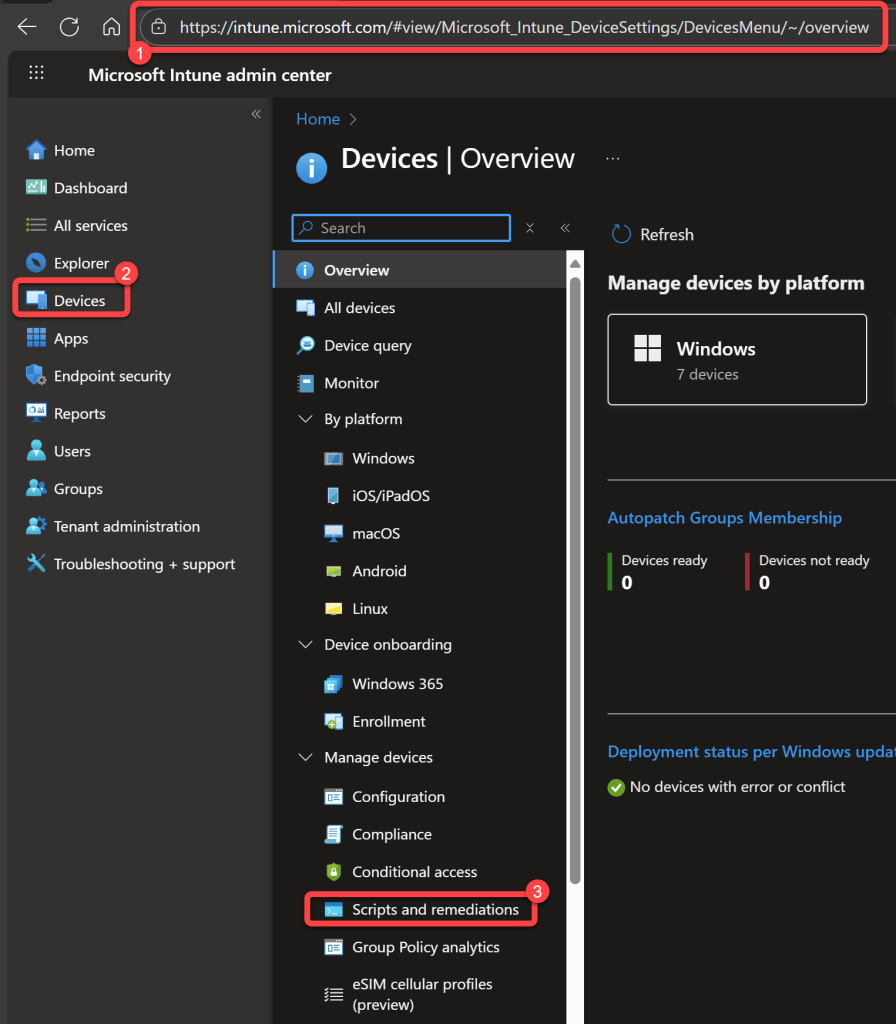
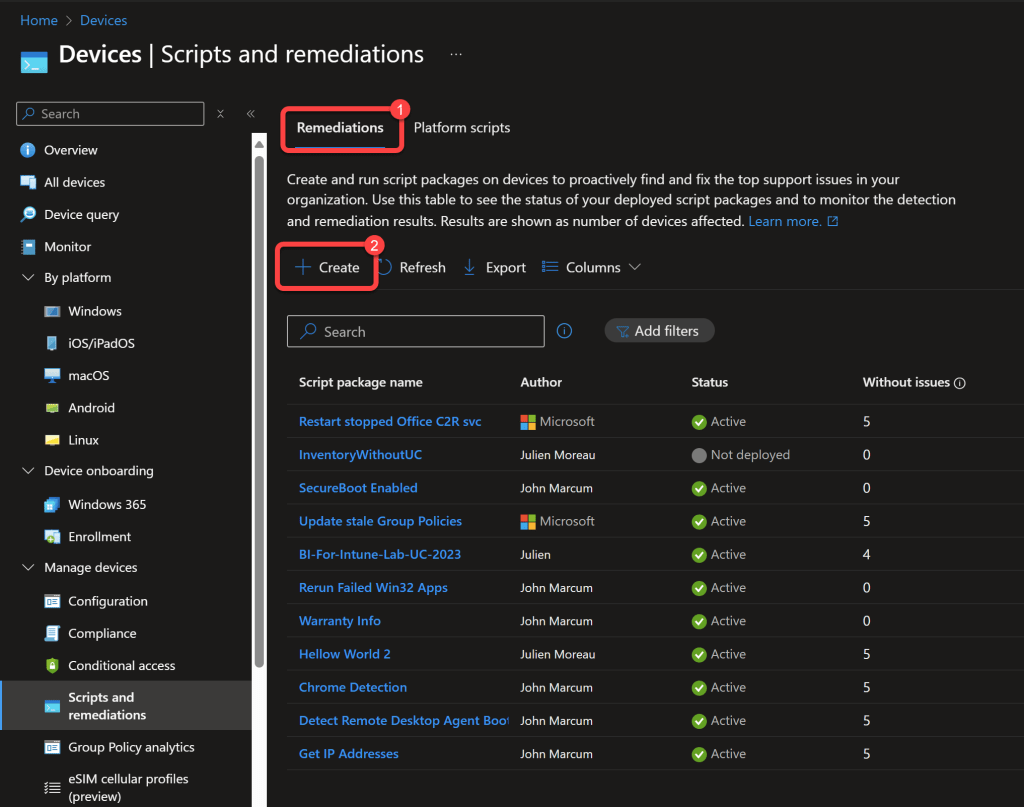
Step 4: Open Scripts and remediations
- In the Intune console select Devices
- Select Scripts and remediations.
Step 5: Create a new remediation
- Select Remediations.
- Select Create.
Step 6: Enter remediation details
- Enter a Name.
- Enter a Description.
- Select Next.

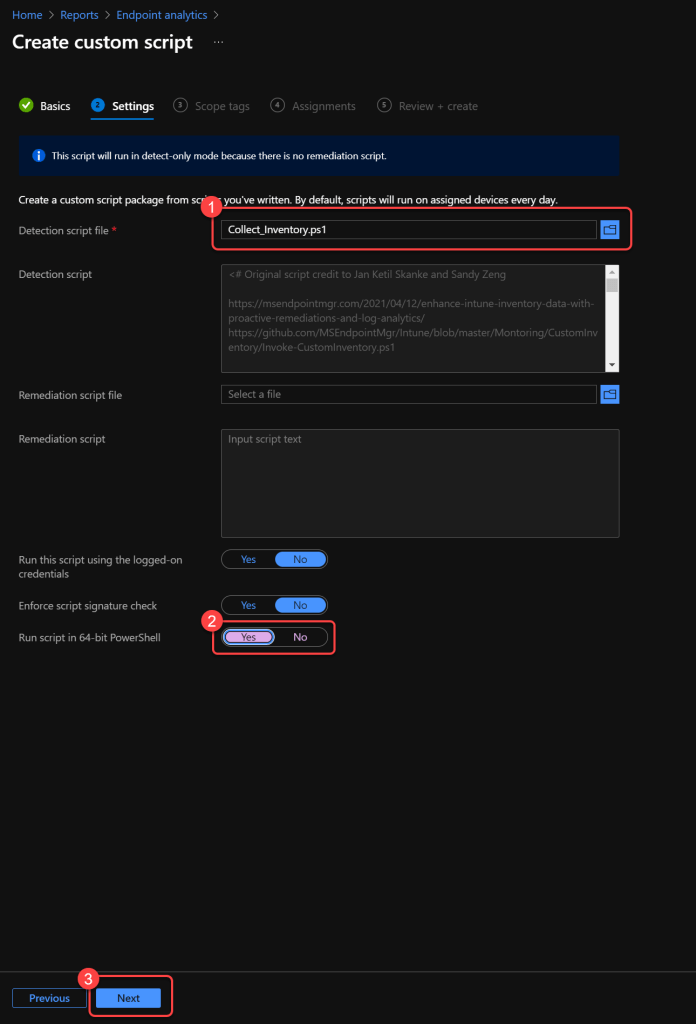
Step 7: Upload the detection script
- For the Detection script file, browse to and select the Inventory.ps1 file.
- Select Yes to run script in 64-bit PowerShell.
- Select Next.
Step 8: Configure scope tags
- Optionally add Scope tags.
- Select Next.

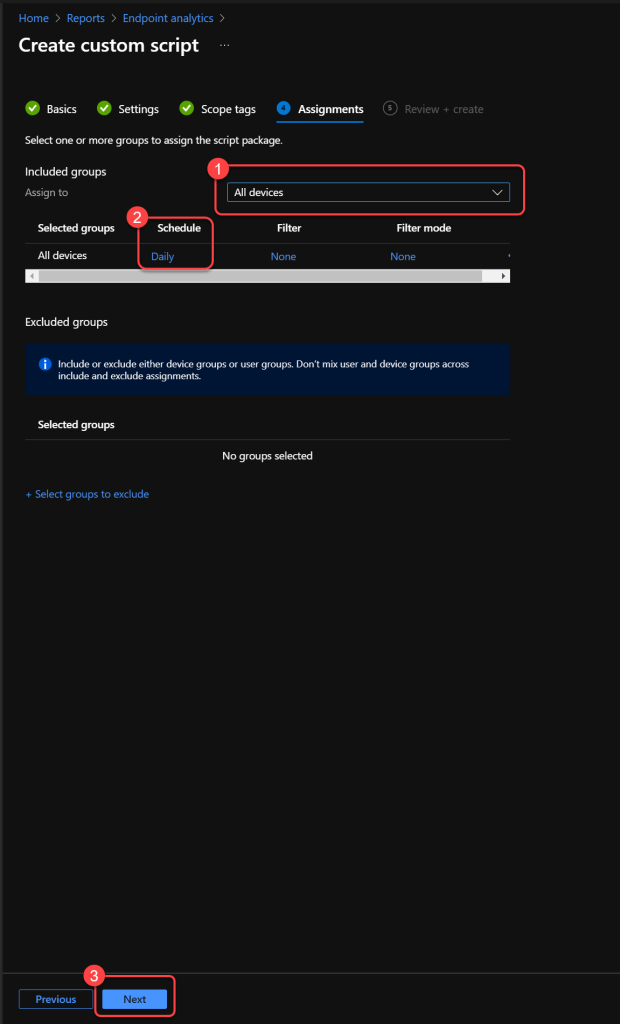
Step 9: Assign devices and schedule
- Select the devices from which you want to collect inventory.
- Adjust the schedule per your requirements.
- Select Next.
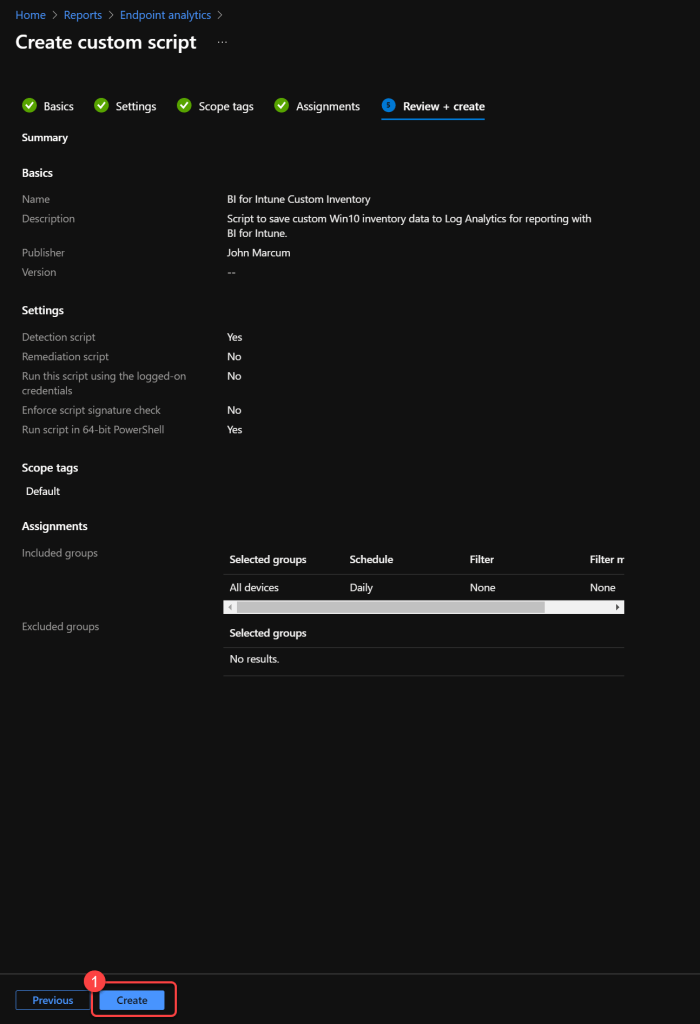
Step 10: Review and create the remediation
- Confirm all of the settings are correct.
- Select Create.