Inventory Microsoft 365 Apps
To populate the Microsoft 365 page you must extend hardware inventory to include the Office 365 ProPlus Configurations WMI classes from the rootcimv2 namespace from a Windows 10 computer. Ensure the following items have been added to Hardware Inventory. Skipping this step will not generate any errors however, the Microsoft 365 page will be blank.
For more information on extending Configuration Manager hardware inventory see Enable or disable existing classes in the How to extend hardware inventory Configuration Manager documentation page.
Prerequisites:
Hardware inventory must be enabled.
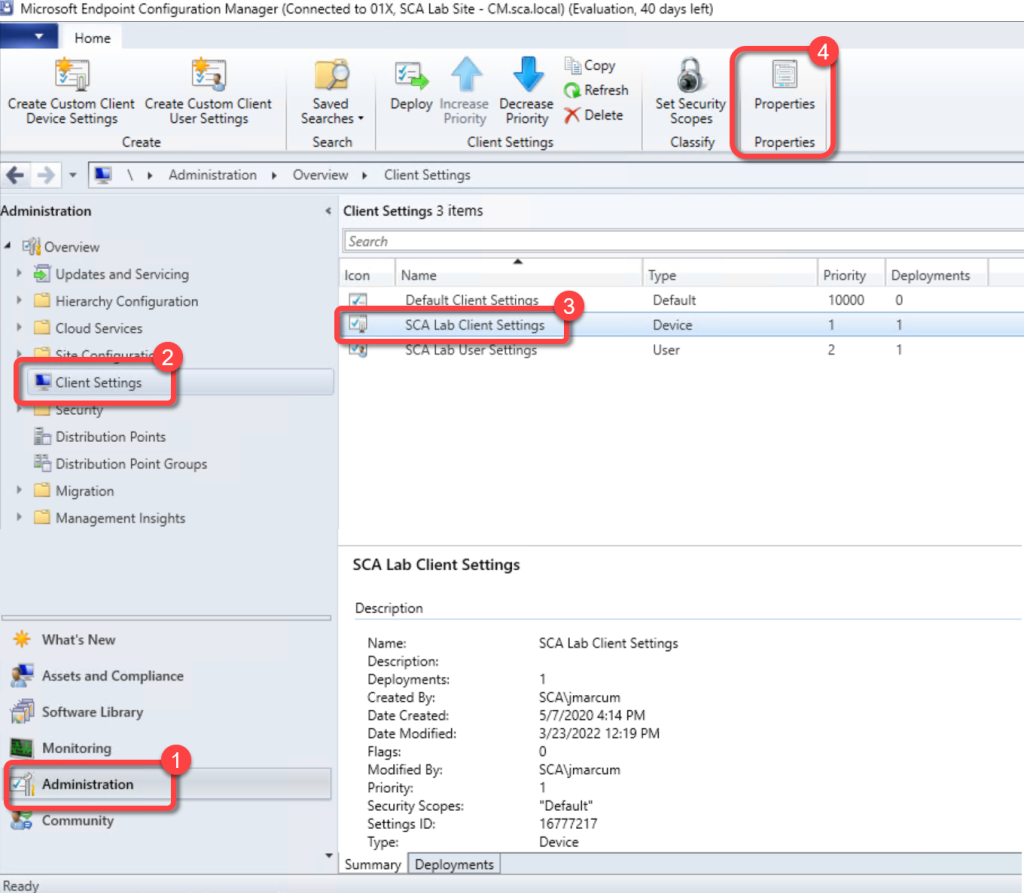
Step 1: Open Client Settings Properties
- In the Configuration Manager console, go to the Administration workspace.
- Select the Client Settings node.
- Select the client settings in which you have configured your hardware inventory settings.
- On the Home tab, in the Properties group, choose Properties.
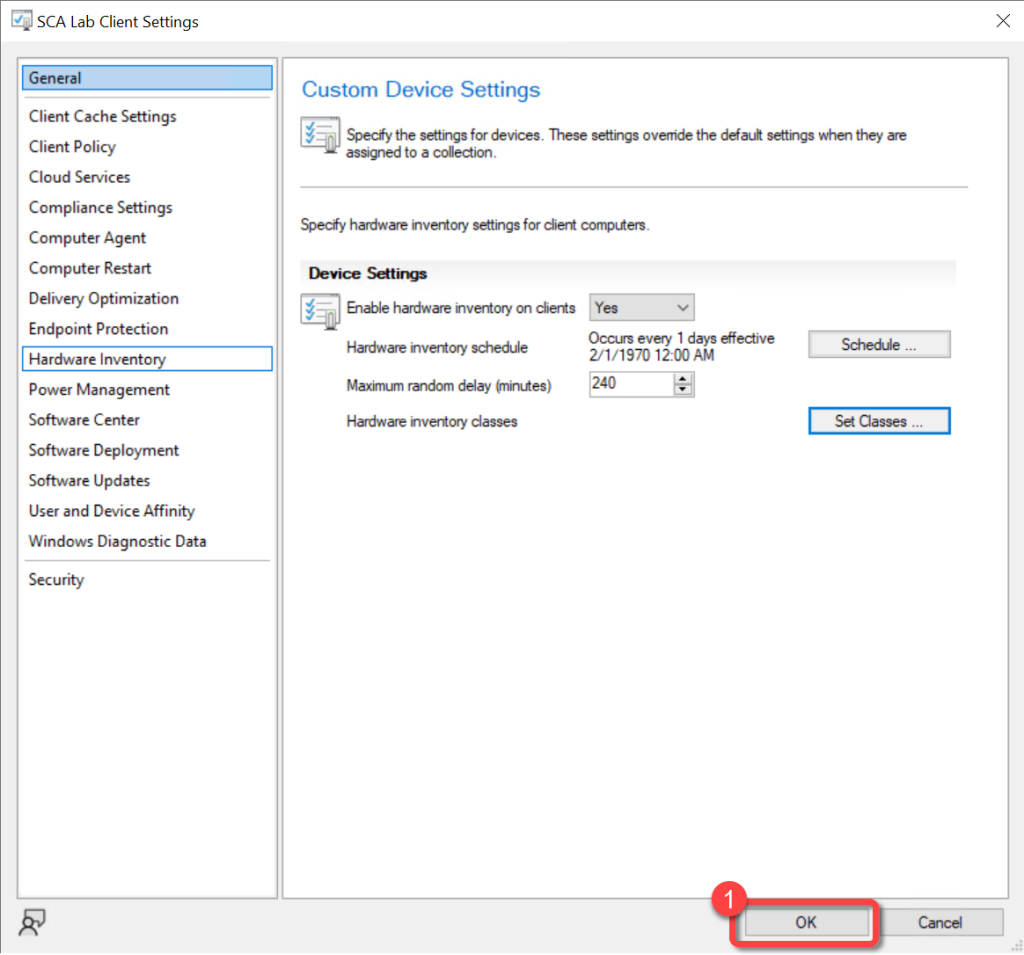
Step 2: Open Hardware Inventory Classes
- In the client settings dialog, choose Hardware Inventory.
- In the Device Settings list, select Set Classes.

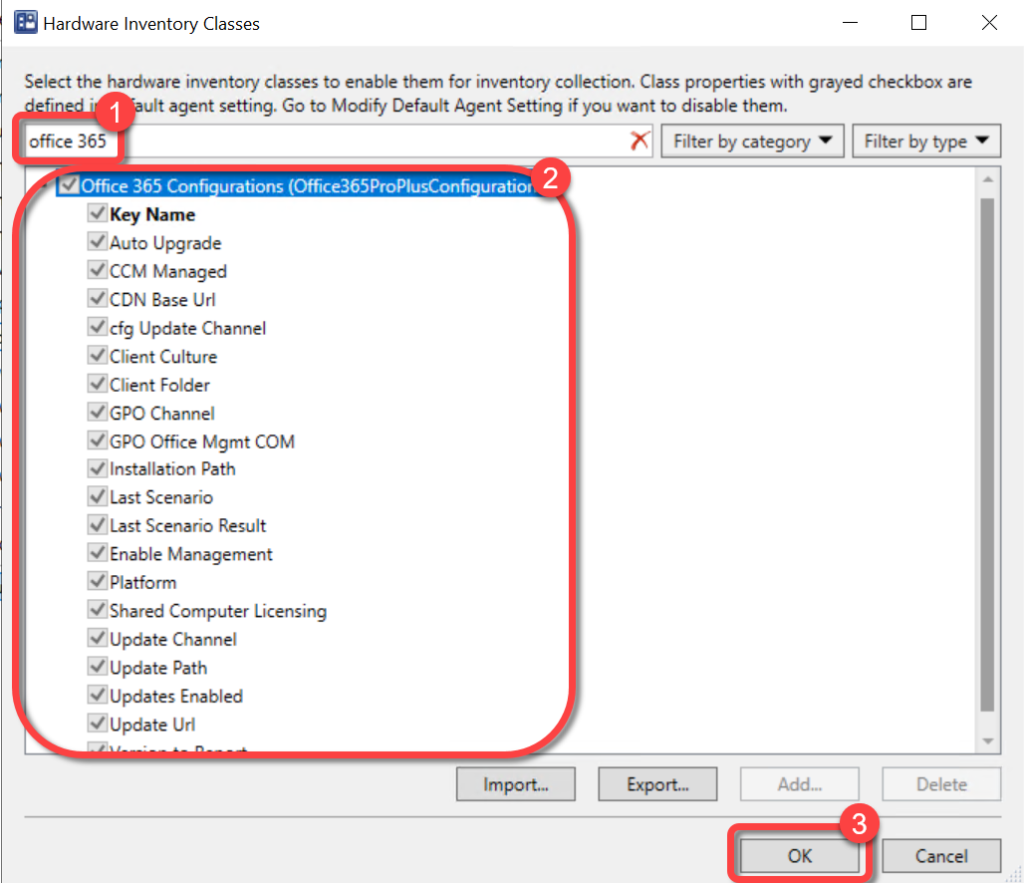
Step 3: Enable Office 365 Class
- In the Hardware Inventory Classes dialog, use the Search for inventory classes field to search for the Office 365 Configurationsclass.
- Select the Office 365 Configurationsclass.
- Select OK
Step 4: Confirm Client Settings
- In the client settings dialog, select OK.